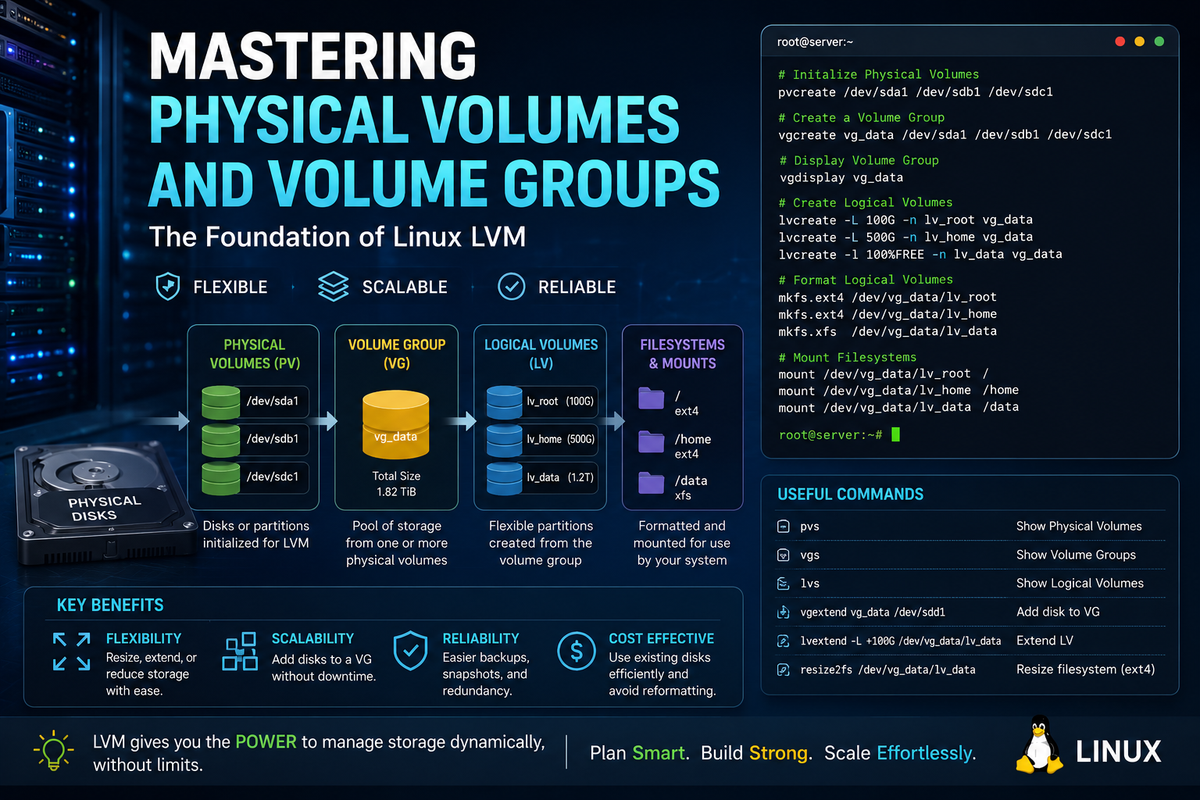
Mastering Physical Volumes and Volume groups

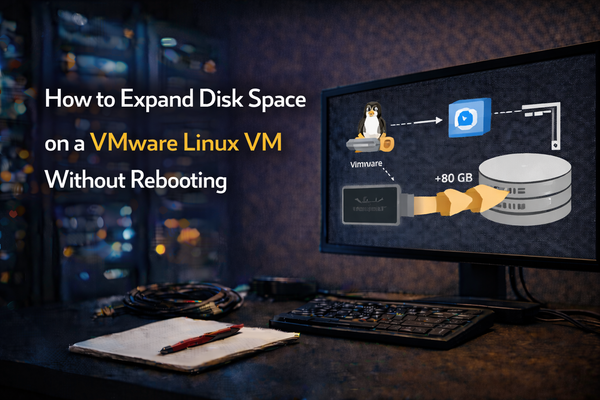
Running out of space on your Linux VM? No problem, LVM (Logical Volume Manager) and VMware vSphere make disk resizing straightforward, even if you've added an entire unpartitioned disk to a volume group. In this post, I'll walk you through the process of resizing LVM managed disks, focusing on adding capacity to an existing disk in a vSphere environment. We'll cover the steps, weigh the pros and cons, and end with some best practices.
Why Use an Unpartitioned Disk in LVM?
When managing storage with LVM, you have the flexibility of adding either a partition or an entire disk to a volume group (VG). Adding an unpartitioned disk can make things simpler, as it skips the partitioning step entirely. This approach is perfect for those who want to dynamically expand storage without hassle. However, using a whole unpartitioned disk for LVM has its own pros and cons:
Pros:
- Simplicity: No partition management means fewer steps and fewer points of failure.
- Full Disk Utilisation: You use the entire disk, so there's no wasted space or issues related to partition boundaries.
- Efficiency: Since LVM abstracts underlying storage, adding capacity is much faster without involving partition tables.
Cons:
- Portability: Moving a raw disk (without a partition table) to another system might be tricky since other tools might not recognise the disk properly.
- Compatibility: Backup tools or other utilities often expect disks to have partition tables, which can cause some issues with recovery tools.
- Cannot be used on the OS disk only on the data disks
That said, let's look at how to resize the disk in this scenario.
Step-by-Step Guide to Resizing an LVM Disk in vSphere
If you're running a Linux VM on a vSphere cluster and need to add space to your LVM-managed disks, you can follow these simple steps:
Step 1: Resize the Disk in vSphere
The first step is to increase the size of the disk in the VMware interface.
- Log in to the vSphere client or vCenter.
- Locate the VM you want to resize.
- Edit the VM settings and increase the size of the existing virtual disk (e.g., from 100GB to 200GB).
- Save your changes.
After this, the VM will see a larger disk size, but the operating system still needs to recognise and utilise the new space.
Step 2: Rescan the Disk in the VM
Next, you need to tell the VM to detect the newly added space without rebooting.
echo 1 > /sys/class/scsi_device/0:0:0:0/device/rescan
Replace 0:0:0:0 with the correct identifier for your disk. To identify your disk, use the following command:
ls /sys/class/scsi_device/
Step 3: Verify the Disk Size
Now, verify the new size of the disk to ensure that the VM recognises it:
lsblk
The output should reflect the increased capacity for your disk (e.g., /dev/sdb).
Step 4: Extend the Physical Volume (PV)
Now that Linux recognises the new disk size, use the pvresize command to let LVM know about the additional space:
pvresize /dev/sdb
Step 5: (Alternative) Add a Brand-New Disk to the Volume Group
If, instead of growing an existing disk, you added a completely new disk to the VM, pvresize does not apply. Initialise the new disk as a physical volume first, then add it to the existing volume group:
pvcreate /dev/sdb
vgextend <vg_name> /dev/sdb
Step 6: Verify the Volume Group (VG) Size
After resizing the physical volume, verify the volume group to make sure the extra space is available:
vgdisplay
Check the "Free PE / Size" field to see the additional capacity available for allocation.
Step 7: Expand Your Logical Volume (LV)
Finally, you can expand an existing logical volume or create a new one to make use of the new space.
Create a New LV:
lvcreate -L 100G -n new_lv my_volume_group
mkfs.ext4 /dev/my_volume_group/new_lv  # Formatting with a filesystem
Extend an Existing LV:
lvresize -r -L +100G /dev/my_volume_group/my_logical_volume # The -r switch automatically resizes the filesystem
Scenario: Expanding a Partition-Backed PV with parted
The steps above assume your physical volume lives directly on a raw, unpartitioned disk. But what if your PV sits on a partition, such as /dev/sdb1? In that case, growing the disk in vSphere is not enough. The partition itself has to be expanded first, because LVM can only use the space that the partition exposes. This is where parted comes in.
The good news: modern kernels support growing a partition while it is in use, so just like the raw-disk scenario, this can all be done online without a reboot.
Step 1: Rescan and Verify the New Disk Size
Rescan the disk exactly as described in steps 2 and 3 above. After the rescan, lsblk will show the mismatch we need to fix:
lsblk
NAME   MAJ:MIN RM  SIZE RO TYPE MOUNTPOINT
sdb      8:16   0  200G  0 disk
└─sdb1   8:17   0  100G  0 part
The disk (sdb) is 200GB, but the partition (sdb1) is still 100GB.
Step 2: Grow the Partition with parted
Start parted on the disk (not the partition):
parted /dev/sdb
(parted) print
If the disk uses a GPT partition table, parted may warn that not all of the disk space is in use and ask whether it should fix it. Answer Fix this moves the backup GPT header to the new end of the disk, which is required before you can extend the partition.
Now resize the partition. resizepart takes the partition number and the new end position; 100% simply means "use everything up to the end of the disk":
(parted) resizepart 1 100%
(parted) quit
If the partition is in use, parted will ask for confirmation. Answer Yes. Growing a partition is safe while it is online; the start of the partition does not move, so the data on it is untouched.
Tip: If you havecloud-utilsinstalled,growpart /dev/sdb 1does the same thing in a single non-interactive command, which is handy for automation with Ansible or cloud-init.
Step 3: Let the Kernel Re-read the Partition Table
parted usually informs the kernel automatically, but if lsblk still shows the old size, force a re-read:
partprobe /dev/sdb
lsblk should now show sdb1 at the full 200GB.
Step 4: Resize the Physical Volume
Now that the partition is larger, tell LVM to claim the new space within it:
pvresize /dev/sdb1
Verify with pvs or vgdisplay the "Free PE / Size" of the volume group should have grown accordingly. From here, extending your logical volume works exactly as shown in Step 7 above with lvresize -r.
Scenario: Adding a Larger PV and Migrating Data
In some cases, you may want to add a larger physical volume and migrate all data from the existing smaller physical volumes to the new one. This can be particularly useful for simplifying your setup or when retiring older disks.
Scenario Overview
- You have two existing physical volumes (PV1 and PV2), each of a certain size (e.g., 100GB each).
- You add a new physical volume (PV3), which is larger than the combined size of PV1 and PV2 (e.g., 250GB).
- You want to migrate all data from PV1 and PV2 to PV3 and eventually remove PV1 and PV2 from the volume group.
Step 1: Add the New Physical Volume
- Add the new disk in vSphere and make it available to your VM.
Extend the volume group to include the new physical volume:
vgextend my_volume_group /dev/sdc
Initialize the new disk as a physical volume:
pvcreate /dev/sdc # Assuming the new disk is /dev/sdc
Step 2: Migrate Data to the New Physical Volume
Use the pvmove command to migrate data from the existing physical volumes to the new one:
pvmove /dev/sdb /dev/sdc
pvmove /dev/sda /dev/sdc
This command moves all extents from /dev/sdb and /dev/sda (the smaller physical volumes) to /dev/sdc (the new larger physical volume).
Step 3: Verify the Migration
After moving the data, verify that all data has been successfully migrated:
pvs
This should show that /dev/sdc now contains all the extents, while /dev/sda and /dev/sdb are empty.
Step 4: Remove the Old Physical Volumes
Once the migration is complete, you can remove the old physical volumes from the volume group:
vgreduce my_volume_group /dev/sda
vgreduce my_volume_group /dev/sdb
You may also want to wipe the old physical volumes if they are no longer needed:
pvremove /dev/sda
pvremove /dev/sdb
Scenario: Backing Up and Restoring Volume Group Configuration
Sometimes, before making significant changes to your LVM setup, such as moving physical volumes between machines or performing migrations. It is advisable to back up the volume group configuration. LVM provides two useful commands for this: vgcfgbackup and vgcfgrestore.
When and Why to Use vgcfgbackup and vgcfgrestore
vgcfgrestore: If something goes wrong and the volume group's metadata gets corrupted, you can use vgcfgrestore to restore the volume group configuration from the backup file.
vgcfgrestore my_volume_group
This command reads the backup file and restores the volume group's metadata to the previous state. This is crucial in scenarios where the VG structure is accidentally damaged or changed in an unintended way.
vgcfgbackup: This command allows you to create a backup of the volume group's metadata. It is especially useful before making major changes to LVM (e.g., resizing, migration, or removing physical volumes). The backup includes important information about the volume group's structure and the associated logical volumes.
vgcfgbackup my_volume_group
By default, this command creates a backup file in /etc/lvm/backup/. You can also specify a custom path if needed.
Best Practices for Using vgcfgbackup and vgcfgrestore
- Backup Before Major Changes: Always run
vgcfgbackupbefore performing operations likepvmove,vgreduce, or even adding new physical volumes. - Store Backups Securely: Ensure that the backup files are stored in a secure location, ideally off the machine, to safeguard against potential disk failures or corruption.
- Testing Restores: Practice using
vgcfgrestorein a test environment to be familiar with the process before needing it in a production environment.
Scenario: Moving LVM PVs from One Machine to Another
Another common scenario is needing to move LVM physical volumes from one machine to another. For example, you might have two PVs located on iSCSI LUNs that need to be moved to a different server. This involves exporting the volume group from the original server, importing it to the destination, and then mounting the logical volumes.
Scenario Overview
- You have two physical volumes (PV1 and PV2) located on iSCSI LUNs.
- You need to move these LUNs to a different machine.
- The logical volumes (LVs) need to be unmounted, the volume group (VG) exported from the original machine, and then imported and mounted on the destination machine.
Step 1: Unmount the Logical Volumes
Before moving the LUNs, unmount any filesystems that are using the logical volumes:
umount /mnt/my_logical_volume
Repeat this step for each logical volume that is mounted.
Step 2: Deactivate the Volume Group
Deactivate the volume group to prepare it for export:
vgchange -an my_volume_group
Step 3: Export the Volume Group
Export the volume group so that it can be recognized by the destination machine:
vgexport my_volume_group
Step 4: Move the iSCSI LUNs to the Destination Machine
Configure the destination machine to connect to the iSCSI LUNs that contain the physical volumes. This will vary depending on your iSCSI setup, but typically involves logging in to the iSCSI target from the destination machine.
Step 5: Import the Volume Group on the Destination Machine
Once the LUNs are connected, import the volume group on the new machine:
vgimport my_volume_group
Step 6: Activate the Volume Group
Activate the volume group to make the logical volumes available:
vgchange -ay my_volume_group
Step 7: Mount the Logical Volumes
Finally, mount the logical volumes to their respective mount points:
mount /dev/my_volume_group/my_logical_volume /mnt/my_logical_volume
Repeat this step for each logical volume that needs to be mounted.
Scenario: Using vgimportclone for Cloned Volume Groups
In some cases, you might need to import a volume group that has been cloned. The vgimportclone command can help in scenarios where you have cloned the storage from one system and need to import the volume group into a new system without conflicts.
Scenario Overview
- You have cloned a disk containing an LVM volume group to another machine.
- The cloned VG has the same metadata as the original, which can cause a conflict.
vgimportcloneis used to resolve these conflicts by assigning a unique identifier to the imported VG.
Step 1: Attach the Cloned Disk
Attach the cloned disk to the destination machine, making sure it is recognized by the operating system.
Step 2: Use vgimportclone
Use the vgimportclone command to import the cloned VG and assign it a new name to avoid conflicts:
vgimportclone -n new_volume_group_name /dev/sdX
Replace /dev/sdX with the cloned disk identifier and new_volume_group_name with a new name for the volume group.
Scenario: Using vgimportdevices for Importing Volume Groups from Specific Devices
Sometimes you may want to import volume groups only from specific devices, especially in complex environments where multiple LVM setups are present. The vgimportdevices command can be useful for this.
Scenario Overview
- You have a system with multiple disks, each with different LVM volume groups.
- You only want to import a VG from a specific device to avoid conflicts with other setups.
Step 1: List Available Devices
First, list the available devices to identify which ones contain the volume group you want to import:
pvs
Step 2: Import Volume Group from Specific Devices
Use vgimportdevices to specify the devices you want to import from:
vgimportdevices my_volume_group /dev/sdX /dev/sdY
Replace /dev/sdX and /dev/sdY with the devices that contain the physical volumes you need to import.
Scenario: Splitting a Volume Group with vgsplit
There are times when you need to split a volume group into two separate groups, for example, when preparing to move some logical volumes to another machine or when re-organizing storage.
Scenario Overview
- You have a single volume group that contains multiple logical volumes.
- You want to move some of these LVs to a new volume group.
- Use
vgsplitto separate out the LVs into a new volume group.
Step 1: Verify Volume Group and Logical Volumes
First, verify the structure of your current volume group and list all logical volumes:
vgdisplay my_volume_group
lvdisplay
Step 2: Split the Volume Group
Use the vgsplit command to create a new volume group containing some of the logical volumes:
vgsplit my_volume_group new_volume_group lv_name1 lv_name2
Replace new_volume_group with the name of the new VG and lv_name1, lv_name2 with the names of the logical volumes you want to move.
Step 3: Verify the Split
After the split, verify that both volume groups exist and contain the expected logical volumes:
vgdisplay
Scenario: Checking Volume Group Metadata with vgck
The vgck command is used to check the consistency of the volume group metadata. This can be especially useful when you suspect there might be corruption in the VG metadata or after a system crash that might have affected LVM structures.
Scenario Overview
- You have a volume group that might have inconsistent metadata, possibly due to a crash or other unexpected event.
- Use
vgckto verify the metadata and identify any inconsistencies.
Step 1: Run vgck on the Volume Group
To verify the consistency of a volume group, run the following command:
vgck my_volume_group
Replace my_volume_group with the name of the volume group you want to check.
Step 2: Review the Output
The vgck command will output any issues or inconsistencies found in the volume group's metadata. If problems are detected, further corrective actions, such as using vgcfgrestore or even manual intervention, might be needed.
When to Use vgck
- After a System Crash: If your system experienced a crash or abrupt shutdown, running
vgckis a good practice to ensure that the VG metadata is not corrupted. - Before Major Operations: Running
vgckbefore major LVM operations likepvmoveorvgreducehelps in ensuring the VG is in a healthy state, preventing complications during these operations.
Best Practices for Disk Resizing and Migration in vSphere
- Backup Before Operations: Always ensure you have a recent backup before resizing or migrating data.
- Monitor Performance:
pvmovecan be resource-intensive. Monitor disk IO and system performance during the operation, especially in production environments. - Plan for Downtime: While
pvmovecan be run online, it's a good idea to plan for potential performance degradation during the migration.
When to Partition vs. When to Use a Full Disk
If you use a partition (/dev/sdb1), resizing involves modifying the partition table to utilise the extra space, which adds an extra layer of complexity. Using the whole disk is generally better for server environments focused purely on LVM managed storage, while partitioning may offer better flexibility if the disk is intended for multiple purposes or for use across different environments.
Conclusion
Resizing LVM disks in a VMware vSphere environment is pretty straightforward. Whether you use an entire unpartitioned disk or stick to partitions, each approach has its advantages and drawbacks. Adding an unpartitioned disk directly as a PV is simpler and well-suited to LVM's dynamic nature, but be sure to consider compatibility and potential portability concerns.
Additionally, migrating data from smaller physical volumes to a larger one can help streamline your storage setup and make future expansions even easier.
Another important use case is moving LVM managed storage from one machine to another, such as iSCSI LUNs between servers. With careful preparation, you can export, import, and mount logical volumes to ensure minimal disruption.
Have you tried adding unpartitioned disks to LVM in your environment? Have you migrated data between physical volumes or moved LVM setups between servers? Let me know your experience, or feel free to ask questions in the comments below, I’d love to hear your thoughts!